 Save
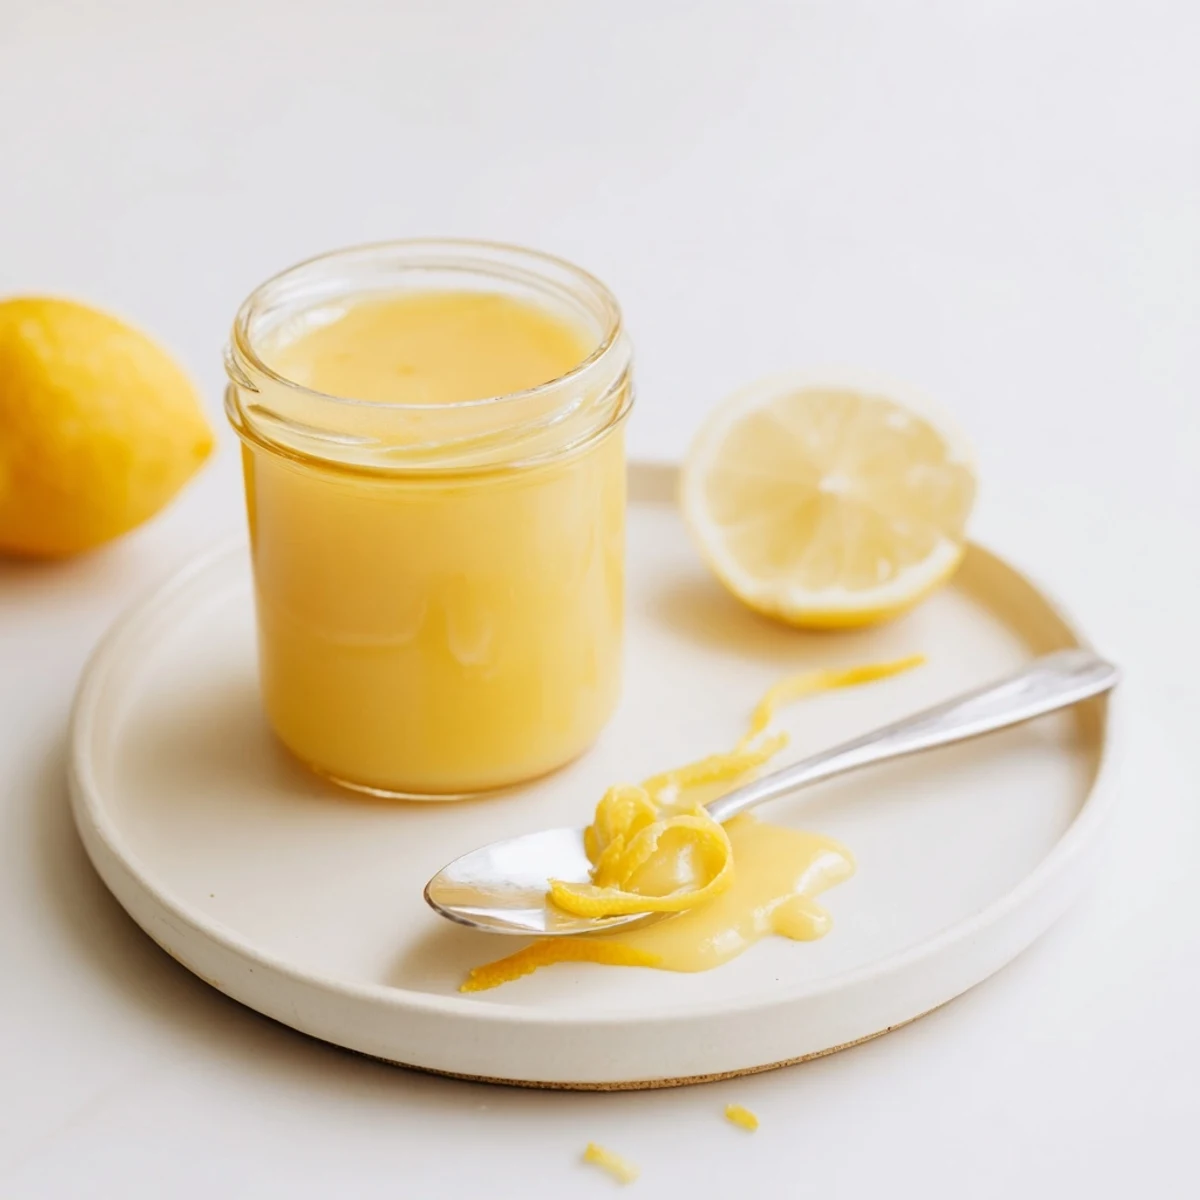
Save This lemon curd combines fresh lemon zest and juice with sugar, whole eggs and yolks, and butter, gently thickened over a double boiler until silky and spoon-coating. Strain to remove zest and bits, cool, then jar and refrigerate up to two weeks. Increase zest for more intensity or swap citrus for lime or orange for variation.
My friend Sarah once handed me a jar of her grandmothers lemon curd and I stood in her kitchen eating it straight from the jar with a spoon until she gently took it away from me.
I started making my own that same week and burned the first batch because I let the water boil too aggressively.
Ingredients
- 3 large lemons (zest and juice, about 1/2 cup juice): Use organic if you can since the zest goes right in and you want clean bright oils on that peel.
- 1 cup (200 g) granulated sugar: Plain white sugar lets the lemon shine without muddying the flavor.
- 2 large eggs plus 2 large egg yolks: The extra yolks are what give curd its dreamy richness so do not skip them.
- 1/2 cup (115 g) unsalted butter, cut into cubes: Cold cubes melt gradually into the mixture which helps everything emulsify smoothly.
Instructions
- Zest then juice the lemons:
- Run your microplane over the lemons with a light hand and stop before you hit the bitter white pith, then squeeze hard until you reach that half cup mark.
- Whisk the base together:
- In a heatproof bowl combine the sugar, whole eggs, and extra yolks and whisk until the mixture looks pale and smooth with no streaks of yolk remaining.
- Add the lemon:
- Pour in the zest and juice and stir until everything is fully blended and fragrant.
- Set up the double boiler:
- Place the bowl over a saucepan of barely simmering water making sure the bowl sits above the water and never touches it directly.
- Cook and whisk in the butter:
- Drop in the butter cubes and whisk constantly for seven to ten minutes until the curd thickens and coats the back of a spoon like warm honey.
- Strain and cool:
- Pour the curd through a fine mesh sieve into a clean bowl to catch the zest and any stray bits of cooked egg, then let it cool to room temperature before jarring.
 Save
Save I brought a jar to a weekend brunch and watched three adults fight over the last smear on a scone.
Flavor Variations Worth Trying
Swap the lemons for limes and you have something that tastes incredible on coconut pancakes, or use blood oranges in winter for a rosy pink curd that looks stunning on toast.
Storage and Shelf Life
Your lemon curd will keep in sealed jars in the refrigerator for up to two weeks though mine never lasts that long.
Serving Ideas Beyond Toast
Layer it between cake rounds, swirl it into yogurt, or spread it on warm shortbread fresh from the oven.
- A thin layer under whipped cream turns a plain tart shell into something restaurant worthy.
- It makes a spectacular filling for layer cakes if you pipe a dam of buttercream around the edge first.
- Always serve it at cool room temperature for the best texture and flavor.
 Save
Save Once you have a jar of homemade lemon curd in your fridge you will find excuses to put it on everything.
Common Recipe Questions
- → How can I tell when the curd is ready?
-
The curd is ready when it has thickened enough to coat the back of a spoon and a line drawn with your finger holds. This typically occurs after 7–10 minutes of gentle, constant whisking over simmering water.
- → What prevents the curd from curdling or scrambling?
-
Cook over a gentle simmer using a double boiler and whisk constantly so the eggs heat slowly and evenly. If the mixture gets too hot, remove the bowl from the pan briefly while continuing to whisk to stabilize the emulsion.
- → Can I change the egg proportions?
-
Whole eggs plus extra yolks give a balance of structure and creaminess. Using more yolks yields a richer, silkier curd; reducing yolks will alter texture and may require shorter cook time and careful monitoring.
- → How should I store the curd and how long does it keep?
-
Strain into sterilized jars, cool to room temperature, then refrigerate. Kept cold in sealed jars and using clean utensils, it will keep for about two weeks.
- → Is there a dairy-free swap for butter?
-
Solid coconut oil is a good dairy-free substitute; add it off the heat so it emulsifies smoothly. Expect a slight change in flavor and mouthfeel compared with butter.
- → How can I vary the flavor or scale the batch?
-
Increase lemon zest for more intensity or substitute lime or orange for different citrus notes. Scale ingredients proportionally; larger batches may take longer to thicken, so monitor texture rather than time alone.
