 Save
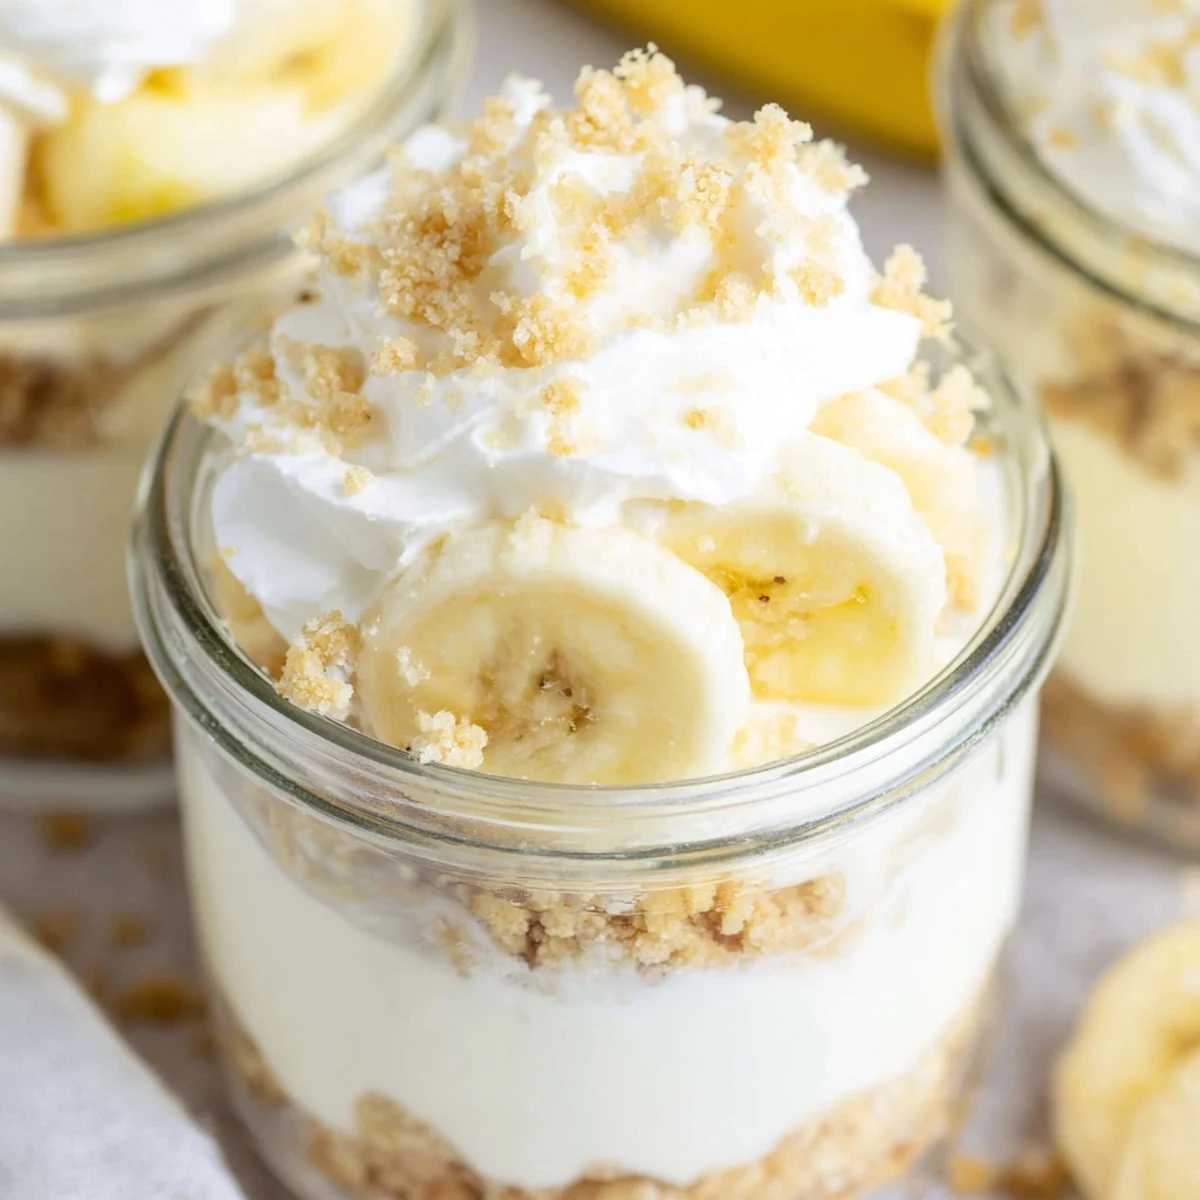
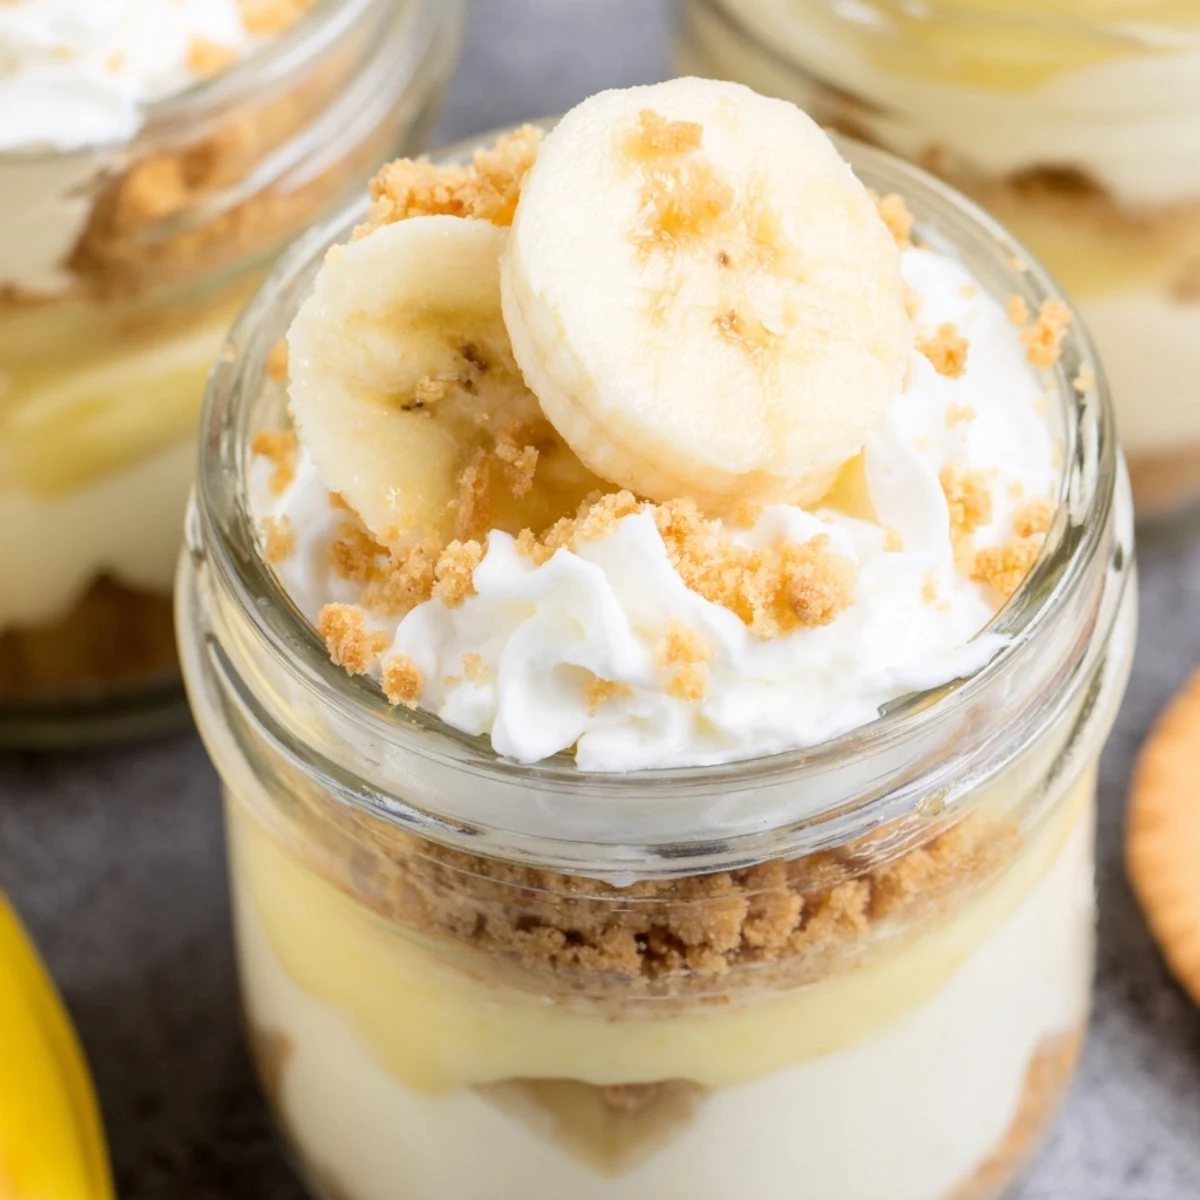
Save These individual cups combine the best of two classic desserts—creamy cheesecake and nostalgic banana pudding. Starting with a buttery vanilla wafer crust, each cup is layered with smooth cream cheese filling, fresh banana slices, and thick banana pudding. The entire assembly requires no baking, just refrigeration time to set.
Perfect for parties, potlucks, or weeknight treats, these cups come together in just 20 minutes of active preparation. The individual portions make serving effortless and eliminate the need for slicing. Customize with extra whipped cream, additional wafer crumbs, or a sprinkle of cinnamon.
Make them up to 24 hours ahead and add fresh toppings just before serving for the best presentation and texture.
The way my grandmother's kitchen always smelled like vanilla and ripe bananas still lives in my senses. These little cups came from wanting that comfort but needing something I could assemble without turning on the oven during a humid July week.
I first made these for a backyard barbecue when the temperature hit ninety degrees and nobody wanted anything heavy. They disappeared so fast that my cousin actually asked if I'd made enough for seconds, which I hadn't, and I've never heard the end of it.
Ingredients
- 1 cup vanilla wafer cookies, crushed: These Nilla wafers are essential because their subtle vanilla flavor and tender crunch create the perfect foundation
- 2 tbsp unsalted butter, melted: The butter binds the crumbs together and adds richness that complements the creamy layers above
- 8 oz cream cheese, softened: Room temperature cream cheese blends smoothly without any lumps ruining the silky texture
- 1/3 cup granulated sugar: Just enough sweetness to balance the tanginess of the cream cheese without becoming cloying
- 1 tsp pure vanilla extract: Real vanilla makes all the difference here, amplifying the natural banana flavor
- 1 cup heavy whipping cream, cold: Cold cream whips up beautifully and lightens the dense cheesecake layer into something airy
- 1 package instant banana pudding mix: This creates an authentic banana pudding flavor without the stovetop fuss
- 1 1/4 cups cold whole milk: Whole milk gives the pudding layer the richest body and creamiest mouthfeel
- 2 ripe bananas, sliced: Look for bananas with some brown spots because they're sweeter and have more pronounced banana flavor
- Additional vanilla wafer crumbs: The topping adds essential crunch and visual appeal to each cup
- Fresh banana slices: These add freshness and tell everyone exactly what flavor awaits inside
- Whipped cream: The finishing touch that makes these feel like something from an old fashioned soda fountain
Instructions
- Build the buttery crust foundation:
- The crumbs should feel like wet sand when you press them into each cup, creating a solid base that won't crumble when you dig in with a spoon
- Whip up the cheesecake layer:
- Beat that cream cheese until it's completely smooth, then fold in the whipped cream as gently as you would fold a precious letter
- Prepare the banana pudding:
- Whisk vigorously for the full two minutes because nobody wants grainy pudding in their parfait
- Layer everything like edible art:
- Spoon the mixtures carefully so you can see distinct stripes through the glass, ending with that final cloud of cheesecake on top
- Add the crowning touches:
- Sprinkle the crumbs generously and arrange banana slices just so, then tuck them away in the fridge to let all those flavors become friends
 Save
Save My daughter now requests these for every special occasion, and watching her carefully scrape the sides of her glass to get every last bite of each layer is better than any compliment I could receive.
Make Ahead Magic
You can assemble these cups a full day before serving and keep them covered in the refrigerator, but wait to add the fresh banana slices and whipped cream until about thirty minutes before you plan to serve them.
Serving Suggestions
These work beautifully for everything from potlucks to dinner parties because they look impressive but require almost no last minute effort. Clear glass cups or small mason jars let those pretty layers shine through and make guests feel like they're getting something special.
Flavor Variations
Sometimes I'll add a sprinkle of cinnamon to the crust mixture for warmth, or fold crushed pineapple into the banana pudding layer for a tropical twist. A drizzle of caramel sauce over the top takes these into sundae territory.
- Try using chocolate wafer cookies instead of vanilla for a mocha banana version
- A tablespoon of cream cheese whipped into the pudding makes it extra rich
- Toasted coconut on top adds wonderful texture and flavor
 Save
Save There's something so satisfying about handing someone their own personal dessert, especially one that looks this beautiful and tastes this much like childhood summers.
Common Recipe Questions
- → Can I make these cups in advance?
-
Yes, these cups can be prepared up to 24 hours in advance. Assemble the cups through step 8, cover tightly, and refrigerate. Add fresh banana slices, wafer crumbs, and whipped cream just before serving to maintain optimal texture and appearance.
- → How do I prevent the bananas from turning brown?
-
To prevent browning, toss sliced bananas lightly in lemon juice before adding them to the cups. Alternatively, add the fresh banana topping immediately before serving. The bananas layered inside will be protected by the pudding and cream cheese mixture.
- → Can I use homemade banana pudding instead of instant mix?
-
Yes, homemade banana pudding made from scratch works beautifully. Prepare a traditional custard-based pudding and allow it to cool completely before layering. The consistency should be thick enough to hold its shape between the cheesecake layers.
- → What size cups work best for this dessert?
-
Use 6-8 ounce clear glasses, mason jars, or dessert cups. The clear vessels showcase the beautiful layers and allow for easy portion control. Ramekins work as well, though you won't see the layered presentation.
- → Can I substitute the vanilla wafers?
-
Graham crackers, gingersnaps, or butter cookies make excellent crust alternatives. For a gluten-free version, use gluten-free vanilla cookies or crushed gluten-free graham crackers in the crust layer.
- → How long do leftovers stay fresh?
-
Leftovers can be stored in the refrigerator for 2-3 days. However, the banana slices may brown and the wafer crust may soften over time. For best results, consume within 24 hours of assembly.
