 Save
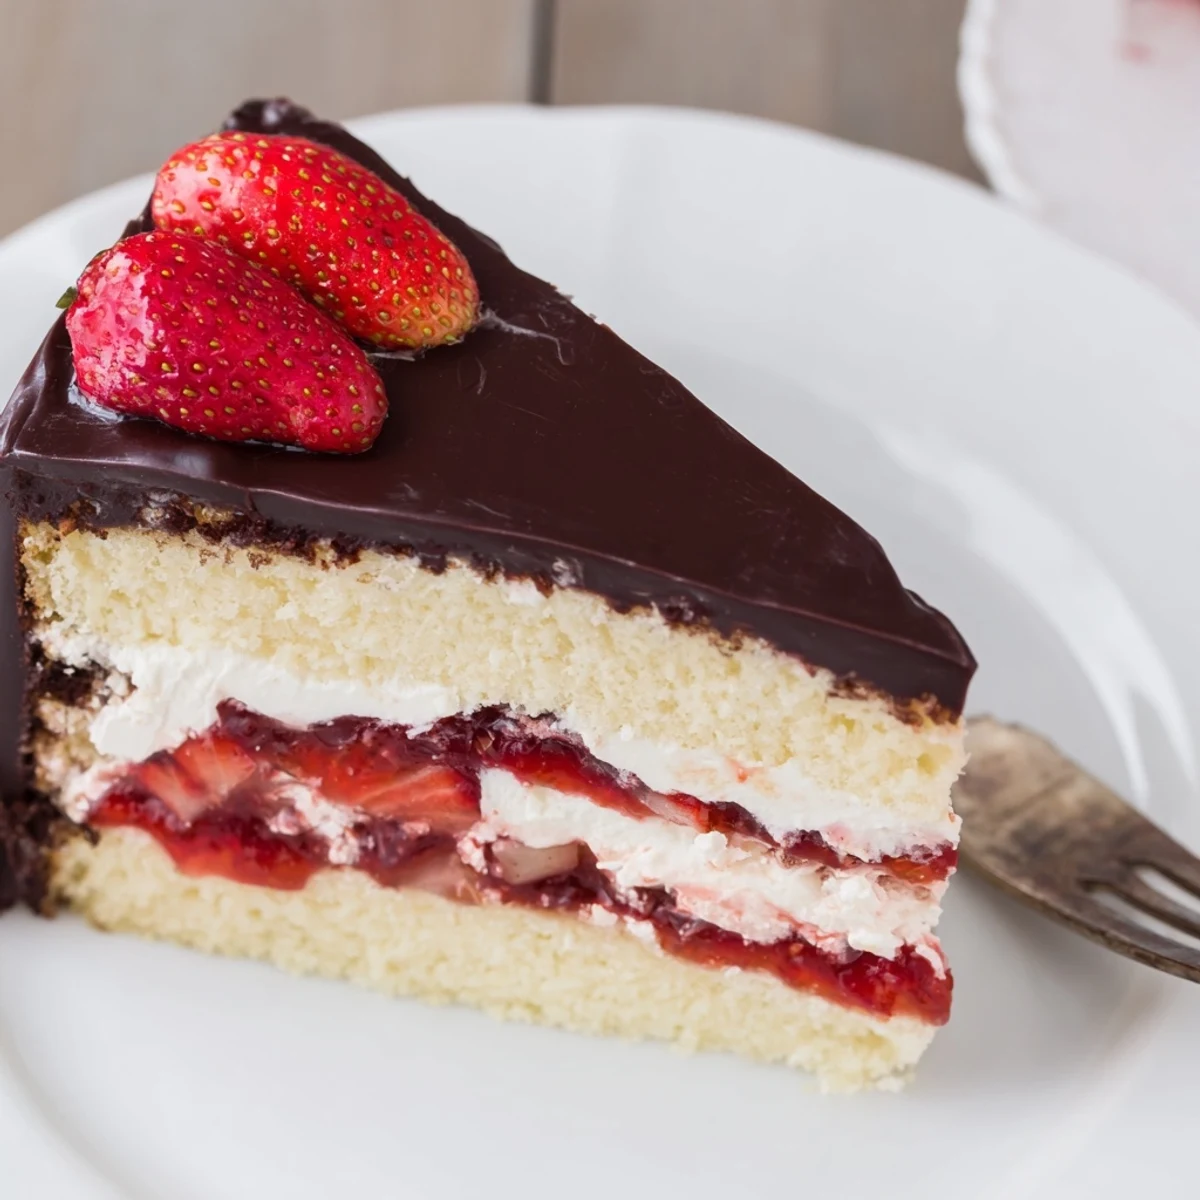
Save This stunning dessert features moist vanilla sponge layers sandwiched around housemade strawberry jam and billowy whipped cream. The entire creation gets draped in a luxurious dark chocolate shell that sets into a crackling, glossy coating.
The magic happens when you pour room-temperature chocolate ganache over a thoroughly chilled cake—the chocolate instantly firms into a professional-looking finish that slices cleanly to reveal those gorgeous pink layers inside.
The chocolate shell moment still makes me grin remembering my sister's wedding anniversary dinner last spring. I'd spent all day building this towering beauty and was practically holding my breath as I poured that glossy chocolate over the chilled cake layers. Watching it cascade down the sides and instantly seize into that perfect crackling shell felt like pure magic and honestly everyone at the table audibly gasped when I brought it out.
My grandmother taught me that truly impressive desserts should always have one element that makes people ask how you did it. This chocolate shell became my signature trick after years of experimenting with different chocolate temperatures and cake chilling times. The secret I discovered is that the cake needs to be freezer cold and the chocolate just slightly warmer than room temperature for that flawless glossy finish.
Ingredients
- All purpose flour: This creates the tender foundation for our cake layers and sifting it first prevents any dreaded lumps in your batter
- Baking powder and salt: These work together to give your sponge that perfect rise and structure without making it taste too chemical or salty
- Large eggs: Room temperature eggs incorporate much better into the batter creating that fluffy texture we want so set them out about an hour before baking
- Granulated sugar: This sweetens and also helps create structure by creaming with the eggs to incorporate air for a lighter sponge
- Whole milk: Using room temperature milk prevents the butter from seizing when you add it to the batter and keeps everything emulsified properly
- Unsalted butter: Melted and cooled butter adds richness without making the cake too dense and lets you control the exact salt level
- Pure vanilla extract: Never skip this because it rounds out all the flavors and makes everything taste more expensive and homemade
- Fresh strawberries: Diced into small pieces these break down into a jammy filling that still has lovely fruit texture in every bite
- Lemon juice: A tablespoon brightens the strawberry filling and helps the cornstarch activate properly for thickening
- Cornstarch: This is essential for transforming the strawberries from juicy fruit into a spreadable filling that wont make your cake soggy
- Heavy cream: Cold heavy cream whips up beautifully and holds its shape between the cake layers and under the chocolate shell
- Powdered sugar: This sweetens and stabilizes the whipped cream without adding any grit like granulated sugar would
- Dark chocolate: Sixty to seventy percent cocoa gives the perfect balance of bitterness and sweetness for the shell while still setting firmly
- Coconut oil: This makes the chocolate shell flexible enough to crack cleanly instead of shattering into a mess when you slice
- Fresh strawberries: These are optional for decoration but they add such a beautiful pop of color against that dark chocolate
Instructions
- Prep your pans and oven:
- Set your oven to 350°F and grease two 8-inch cake pans thoroughly before lining the bottoms with parchment paper so the cakes release perfectly later.
- Whisk the dry ingredients:
- Combine the flour baking powder and salt in a medium bowl whisking them together really well so you dont have to worry about baking powder clumps later.
- Beat eggs and sugar:
- In your largest bowl beat those room temperature eggs and granulated sugar on high speed for about 5 minutes until the mixture looks pale fluffy and almost doubled in volume.
- Fold and combine:
- Gently fold in your flour mixture using a spatula then add the milk melted butter and vanilla mixing only until everything just comes together.
- Bake the layers:
- Divide your batter evenly between the prepared pans and bake for 25 to 30 minutes until a toothpick inserted in the center comes out clean.
- Cool completely:
- Let the cakes rest in their pans for 10 minutes then turn them out onto wire racks to cool completely before you even think about assembling.
- Make strawberry filling:
- Combine strawberries sugar lemon juice and cornstarch in a saucepan over medium heat stirring constantly for about 7 minutes until it looks thick and jammy then cool completely.
- Whip the cream:
- Beat the cold heavy cream with powdered sugar and vanilla until you have stiff peaks then keep it chilled until youre ready to assemble the cake.
- Assemble the layers:
- Place one cake layer on your serving plate spread with strawberry filling then a layer of whipped cream before topping with the second cake layer.
- Frost and freeze:
- Cover the entire cake with the remaining whipped cream in a smooth even layer then freeze for exactly 1 hour until its very firm to the touch.
- Prepare chocolate shell:
- Melt the chocolate and coconut oil together over simmering water or in short microwave bursts stirring until completely smooth then let it cool to room temperature.
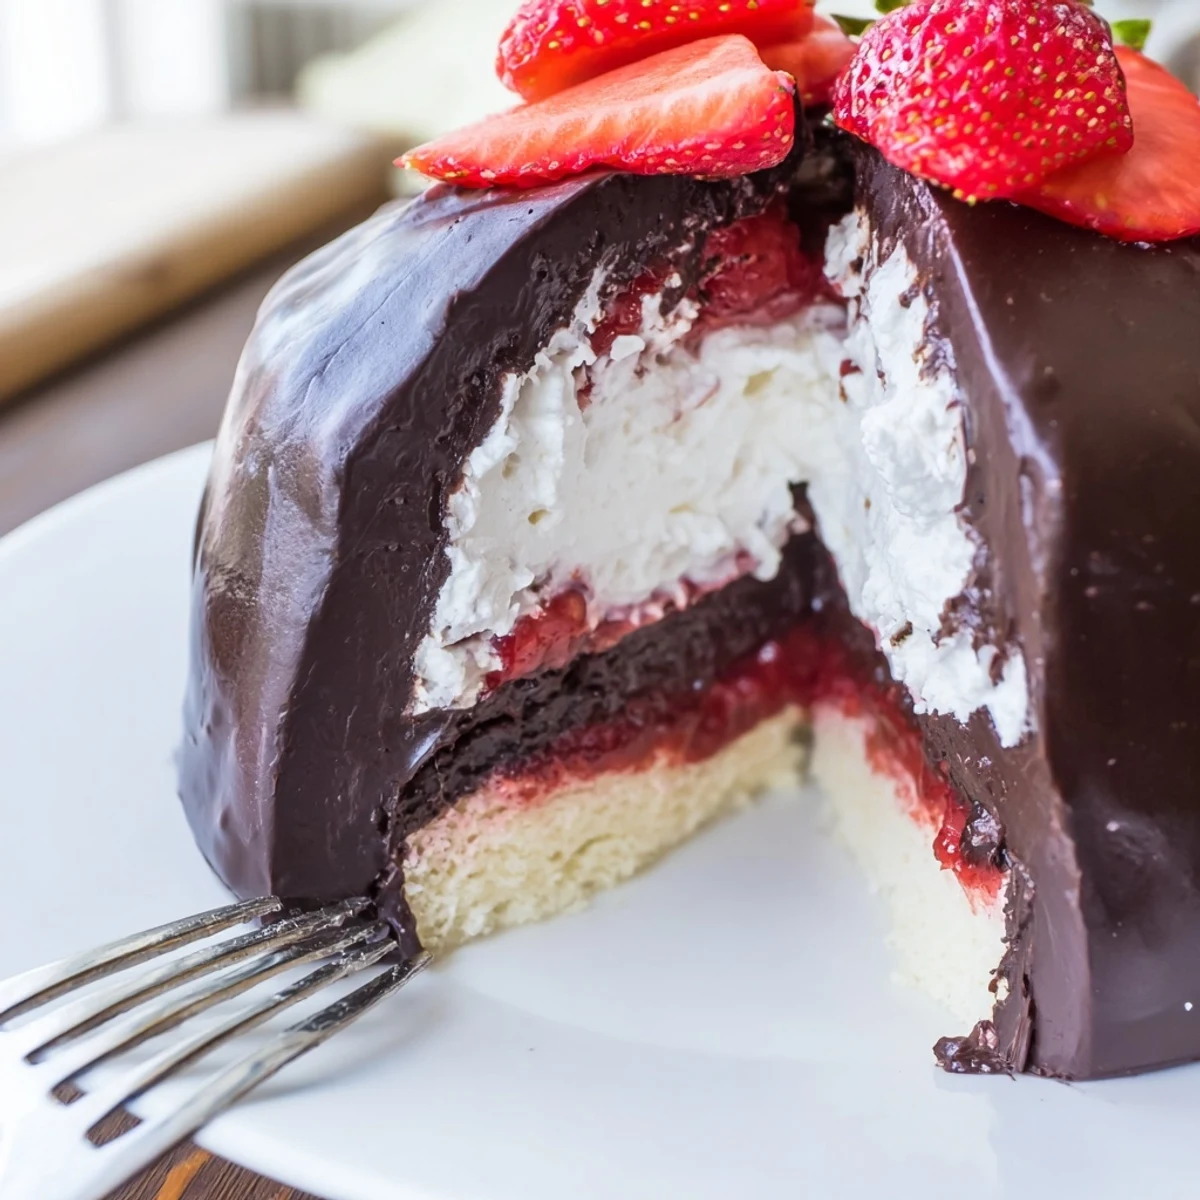
- Create the shell:
- Pour the chocolate over your frozen cake letting it cascade down the sides and cover everything then watch it set into that gorgeous glossy shell.
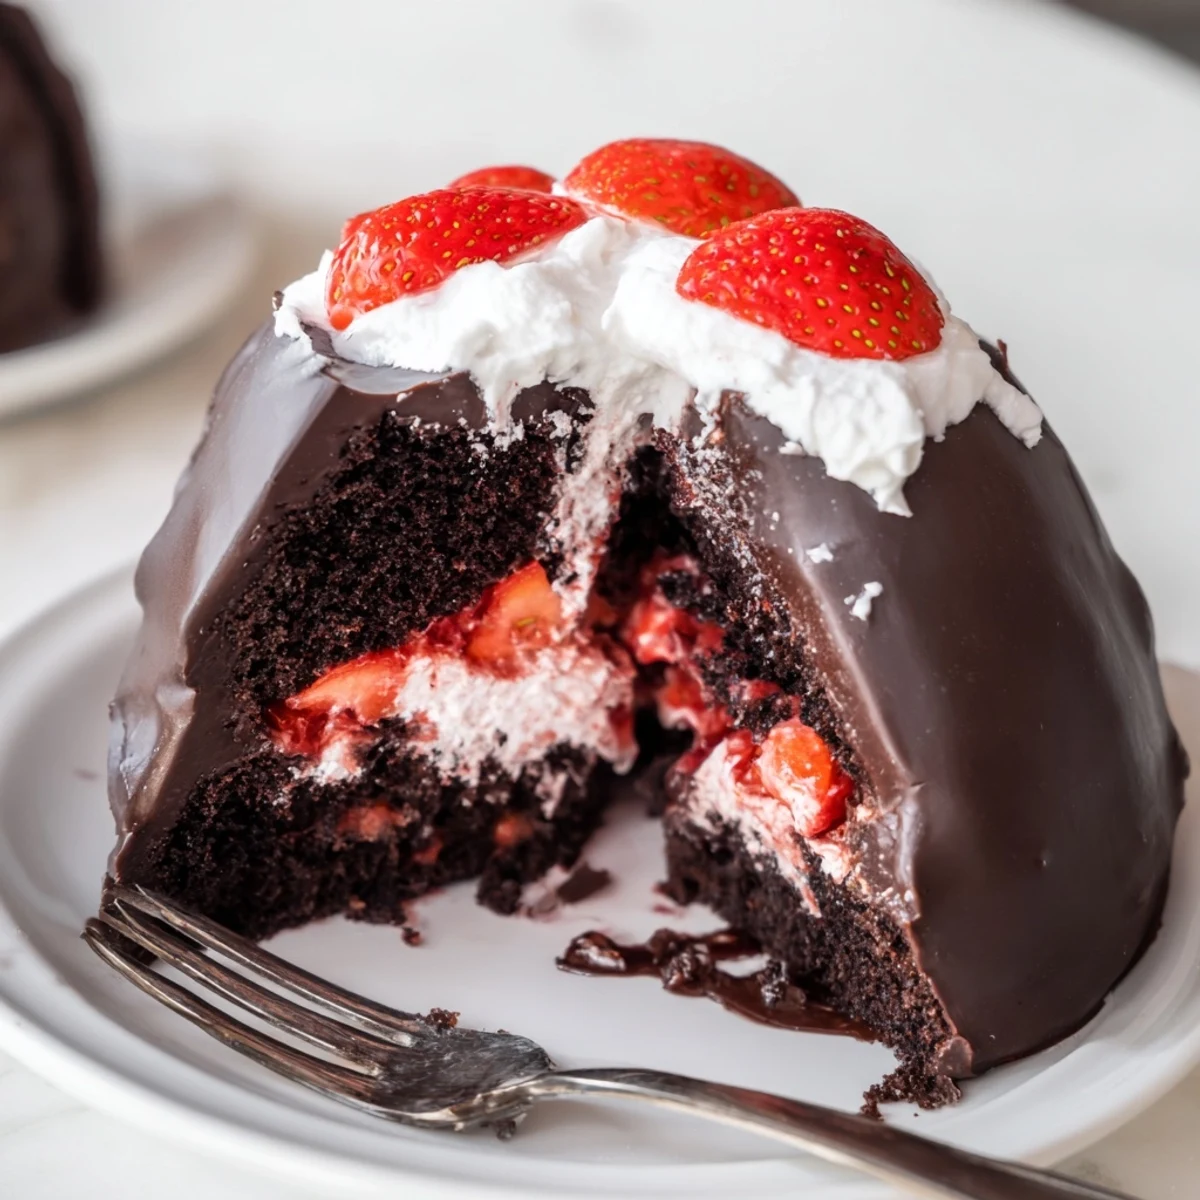
- Final chill and serve:
- Decorate with fresh strawberries if you like then chill for 30 more minutes before slicing to let everything set up perfectly.
 Save
Save This recipe has become my go to for celebrations because it always stops conversation when that first slice reveals the stunning layers inside. Last Christmas my uncle actually put down his fork and asked if I'd secretly gone to culinary school which was probably the biggest compliment I've ever received in the kitchen.
Making It Ahead
You can bake the sponge layers up to two days in advance and wrap them tightly in plastic wrap at room temperature. The strawberry filling also keeps beautifully in the refrigerator for three days so you can prep most components before the big day and just assemble and shell it at the last minute.
Getting The Perfect Shell
The temperature difference between your frozen cake and the chocolate is what creates that satisfying crack when you cut into it. I always test a small amount of chocolate on the back of a chilled spoon first to make sure it sets with that gorgeous gloss before I commit to pouring it over the entire cake.
Serving And Storage
This cake actually gets better after sitting in the refrigerator for a day because the flavors have time to mingle and the texture becomes even more luxurious. Use a sharp knife dipped in hot water to get those clean picture perfect slices that show off all the beautiful layers.
- Leftovers keep well in the refrigerator for up to four days though the shell might lose some of its crackle over time
- For the sharpest slices wipe your knife clean between each cut and dip it in hot water to glide through the chocolate cleanly
- Bring slices to room temperature for about 15 minutes before serving to experience the full range of textures and flavors
 Save
Save Every time I make this cake I'm reminded of why baking feels like such a gift. The way something this beautiful comes from simple ingredients transformed by time and patience still feels like a little bit of kitchen magic.
Common Recipe Questions
- → Why must the cake be frozen before adding the chocolate shell?
-
The cake needs to be thoroughly frozen so the warm chocolate mixture sets immediately upon contact. This creates the signature glossy, crackling shell rather than soaking into the whipped cream or sliding off the sides.
- → Can I use milk chocolate instead of dark?
-
Yes, though the shell will be softer and sweeter. Dark chocolate provides the best crackle effect due to its higher cocoa content and firmer setting point. If using milk chocolate, chill longer before serving.
- → How far in advance can I make this?
-
The assembled cake with whipped cream can be frozen up to 24 hours before adding the chocolate shell. Once coated, it keeps refrigerated for 2-3 days, though the shell may lose some crunch over time.
- → What's the purpose of coconut oil in the chocolate shell?
-
Coconut oil thins the melted chocolate to a pourable consistency and helps it set with a beautiful shine while maintaining that satisfying snap when you cut into it. It also prevents the chocolate from seizing.
- → Can I make the strawberry filling ahead?
-
Absolutely. The cooked strawberry filling can be made up to a week ahead and stored in an airtight container in the refrigerator. Bring it to room temperature before assembling to ensure even spreading.
