 Save
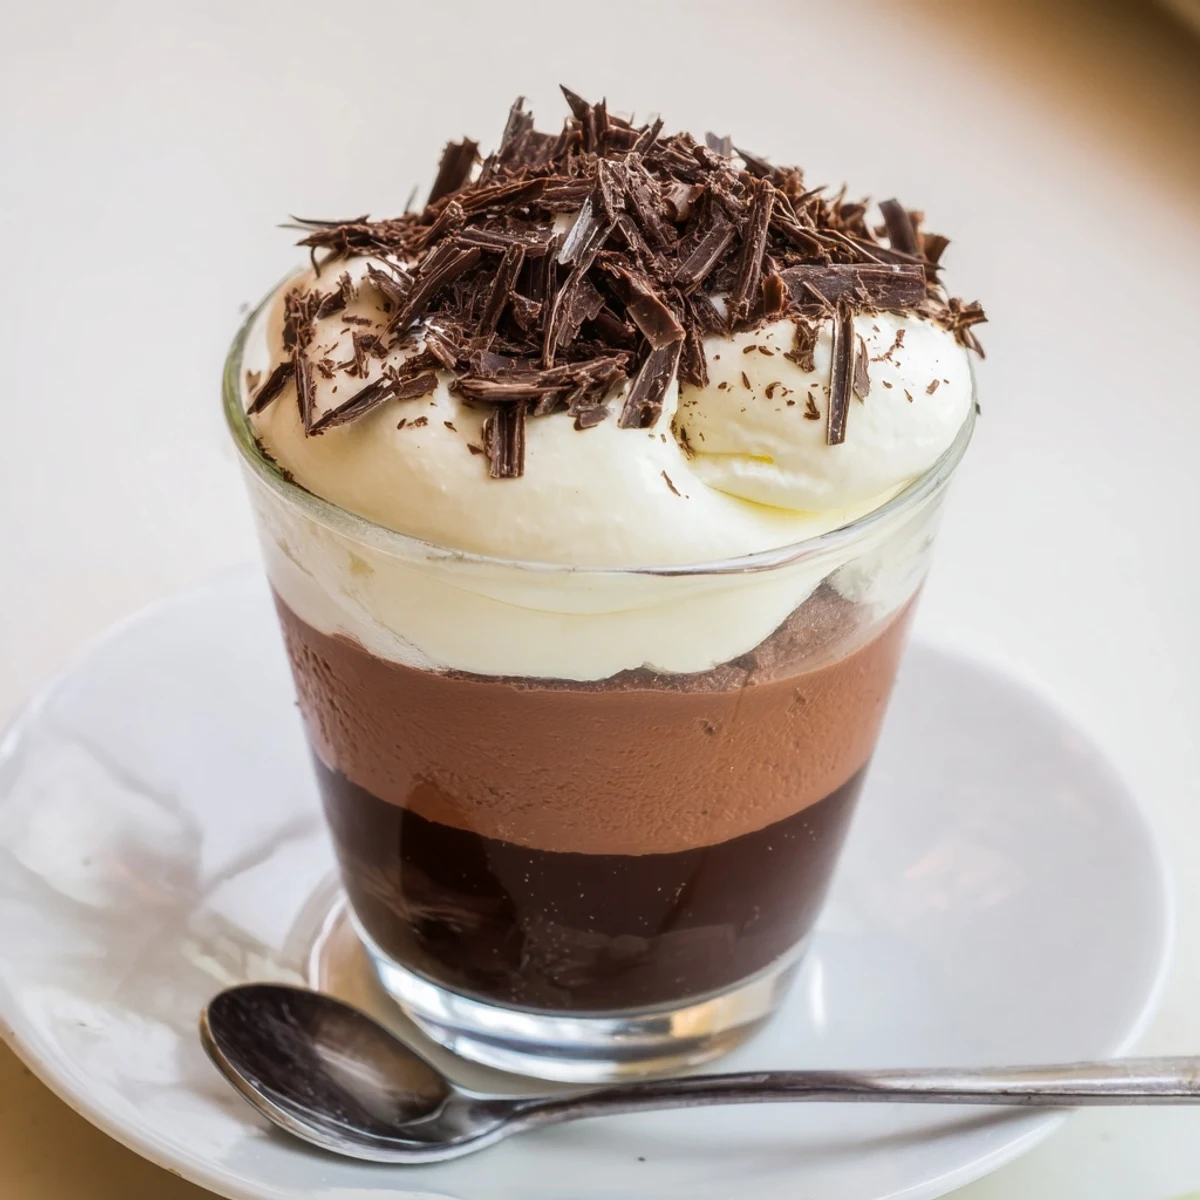
Save Layer three mousses—dark, milk and white—into six small cups. Melt each chocolate, cool slightly, whisk egg yolks with sugar, fold in chocolate then gently fold in softly whipped cream. Chill between layers and once assembled for at least 1 hour. Add coffee liqueur to the dark layer or shave chocolate on top. Ready in about 2 hours including chilling.
The first time I made triple chocolate mousse cups, I was tempted by the sheer gleam of all three chocolates lined up on my counter. The smell of melted chocolate hung in the air, inviting curious glances into the kitchen. There was a quiet thrill in seeing the different mousses slowly take shape—each with its own mood and color. Even though I made a spectacular mess, there was something about layering them that felt as satisfying as finishing a puzzle.
Not long ago, I made these mousse cups for a friend's birthday picnic, and the way everyone's spoons dove in at once made me laugh out loud. Somehow, the layered look broke the ice and instantly started a debate about which chocolate should be on top. A few of us even tried to eat the top layer separately to savor each one. That afternoon, those cups vanished long before anything else on the dessert table.
Ingredients
- Dark chocolate (minimum 60% cocoa): The deep, rich flavor anchors the whole dessert; I find that chopping the chocolate finely makes melting a breeze.
- Egg yolks: Essential for the creamy texture, and I've learned to let them come to room temperature for easier mixing.
- Sugar: Use just enough to keep the mousses delicate, not overly sweet—taste as you go if you like to tweak.
- Heavy cream (cold): Whipping when cold gives the fluffiest results, so I always pop the bowl in the fridge first.
- Milk chocolate: Brings a mellow, comforting layer right in the middle; don't rush the cooling or it will melt the cream when folded in.
- White chocolate: Adds a sweet, buttery top note to finish—good quality makes all the difference in flavor and smoothness.
- Shaved chocolate or cocoa powder (optional): Adds just a touch of glamour if you want to impress any dessert skeptics.
Instructions
- Melt the dark chocolate:
- Gently melt the dark chocolate in a bain-marie or microwave in short bursts, swirling as it turns glossy and smooth. Let it cool a few minutes so it won’t melt your next layer.
- Mix egg yolk and sugar:
- Whisk the egg yolk with sugar until it’s light in color and airy, almost surprisingly creamy. This always feels like a tiny victory when it goes right.
- Combine and fold:
- Stir the melted chocolate into the egg mixture until fully combined. The aroma at this moment is reason enough to pause and inhale.
- Whip and fold cream:
- Beat the cold heavy cream to soft peaks—watch for the soft ridges to hold their shape, then gently incorporate into the chocolate base without overmixing. Carefully spoon this mousse into the bottom of each serving cup.
- Repeat with milk chocolate:
- Start this layer using the exact same method, letting the milk chocolate mixture cool before folding in whipped cream. Spoon gently over the dark chocolate, being careful not to disturb the bottom layer.
- Prepare white chocolate mousse:
- Repeat again for the white chocolate layer, handling it delicately since it is the sweetest and softest; pipe or spoon it on top. Chill all the layered cups for at least 1 hour, or until set and thoroughly cold.
- Add finishing touches:
- Right before serving, add shaved chocolate or a dusting of cocoa powder if you want to make them extra eye-catching. Serve immediately after decorating for best texture.
 Save
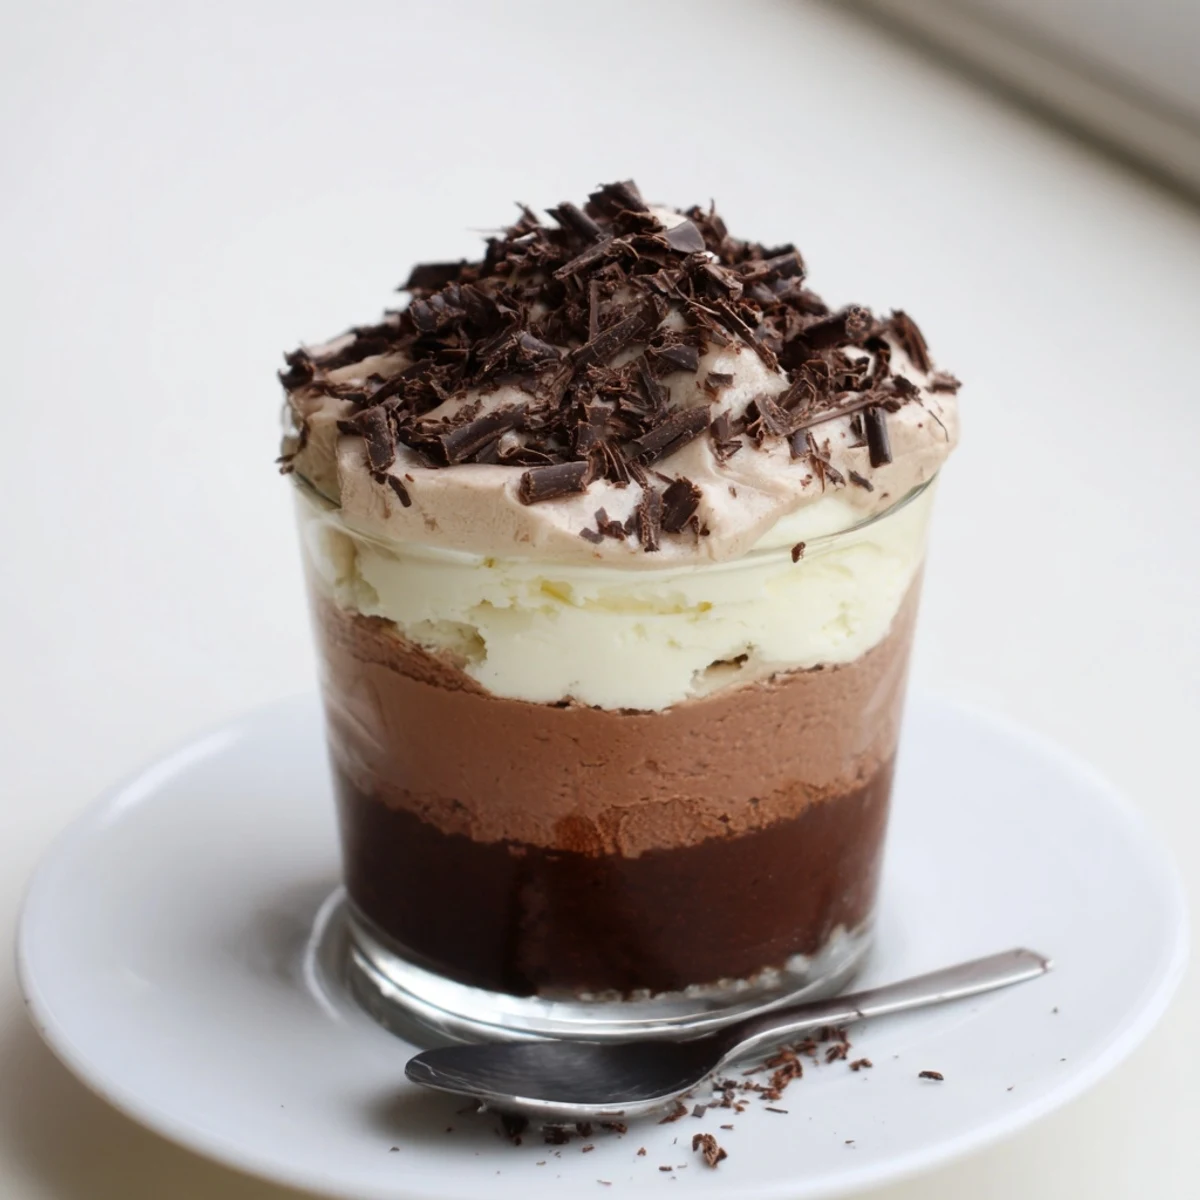
Save One chilly evening when I brought these out after dinner, conversation paused and all you could hear was the soft clink of spoons and a happy sigh or two. It turned a regular meal into a small celebration.
Tricks for Perfect Layering
I've learned that patience is the not-so-secret ingredient here—if you try to rush through the layers, they blur and the magic is lost. Setting each layer in the fridge for a brief chill gives you those crisp, distinct strata that make everyone swoon when digging in. Using a piping bag or even a zip-top bag with the tip cut off helps add mousse where you want it, neatly and quickly. The layering process gets more satisfying every time you make these.
Choosing the Right Chocolates
Over time, I've tested a few brands and the difference is clearly worth the splurge—a high-quality chocolate, especially for the white layer, delivers nuanced flavors you won't forget. Look for chocolate bars you love snacking on, not just baking chocolate. Sometimes I blend a touch of espresso powder into the dark layer for an extra kick. Reading ingredient labels has saved me from surprise odd flavors more than once.
Serving and Garnish Ideas
Presentation always gets a little glow-up with a pinch of cocoa powder or artful chocolate curls right before serving. For a party, I set out tiny spoons—the kind that almost force you to slow down and savor each bite. If I'm feeling playful, I'll add a fresh berry or two on top, but the layers themselves are plenty dramatic on their own.
- Add a small drizzle of caramel to the plate beneath each cup for extra flair.
- Chill the cups on a tray so you can move them in and out of the fridge all at once.
- Keep any leftovers tightly covered to prevent fridge odors sneaking in.
 Save
Save Triple chocolate mousse cups always seem to draw a little delighted silence in any room. They are worth every careful, chocolatey minute in the kitchen.
Common Recipe Questions
- → Can I use pasteurized eggs or an alternative for safety?
-
Use pasteurized egg yolks to reduce risk, or gently cook the yolk and sugar over a bain-marie until thickened before folding in chocolate and cream. For an egg-free approach, try a silken-tofu or aquafaba-based mousse adapted to layer similarly.
- → How do I get stable, airy mousse layers?
-
Whip the cream to soft peaks and fold gently to retain air. Ensure melted chocolate is cool but still pourable before combining with yolks to prevent deflating. Chill between layers to help each set cleanly.
- → Any tips for clean, even layers in the cups?
-
Pipe or spoon each layer slowly, then tap cups lightly to remove air pockets. Chill the base layer 10–20 minutes in the freezer to firm slightly before adding the next layer for sharper separation.
- → How long can I make these ahead and how should I store them?
-
Assembled cups keep well in the refrigerator for up to 48 hours covered. Freezing is possible but may alter texture; if frozen, thaw overnight in the fridge before serving and expect slight loss of mousse lightness.
- → What chocolate quality and percentages work best?
-
Use good-quality chocolate: 60%+ for dark, standard milk chocolate for the middle layer, and a sweet white chocolate for the top. Higher cocoa solids give depth to the dark layer; balance sweetness across the three.
- → How can I vary the flavors without changing technique?
-
Add a splash of coffee liqueur to the dark layer, a pinch of sea salt to the milk layer, or a strip of orange zest to the white layer. Keep additions small so they don't affect texture or setting time.
