 Save
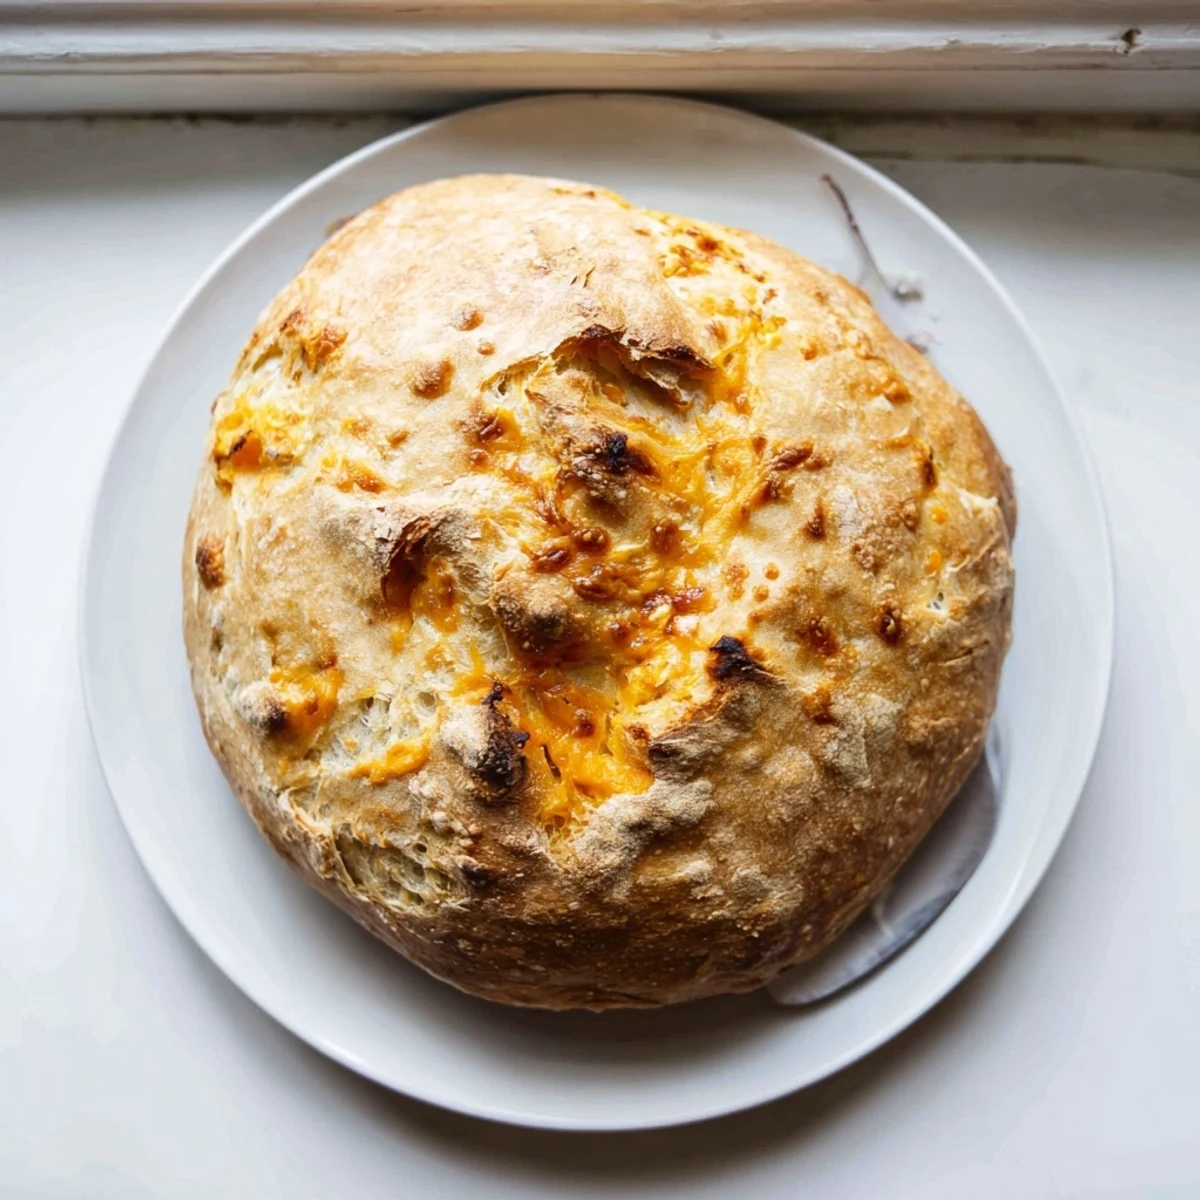
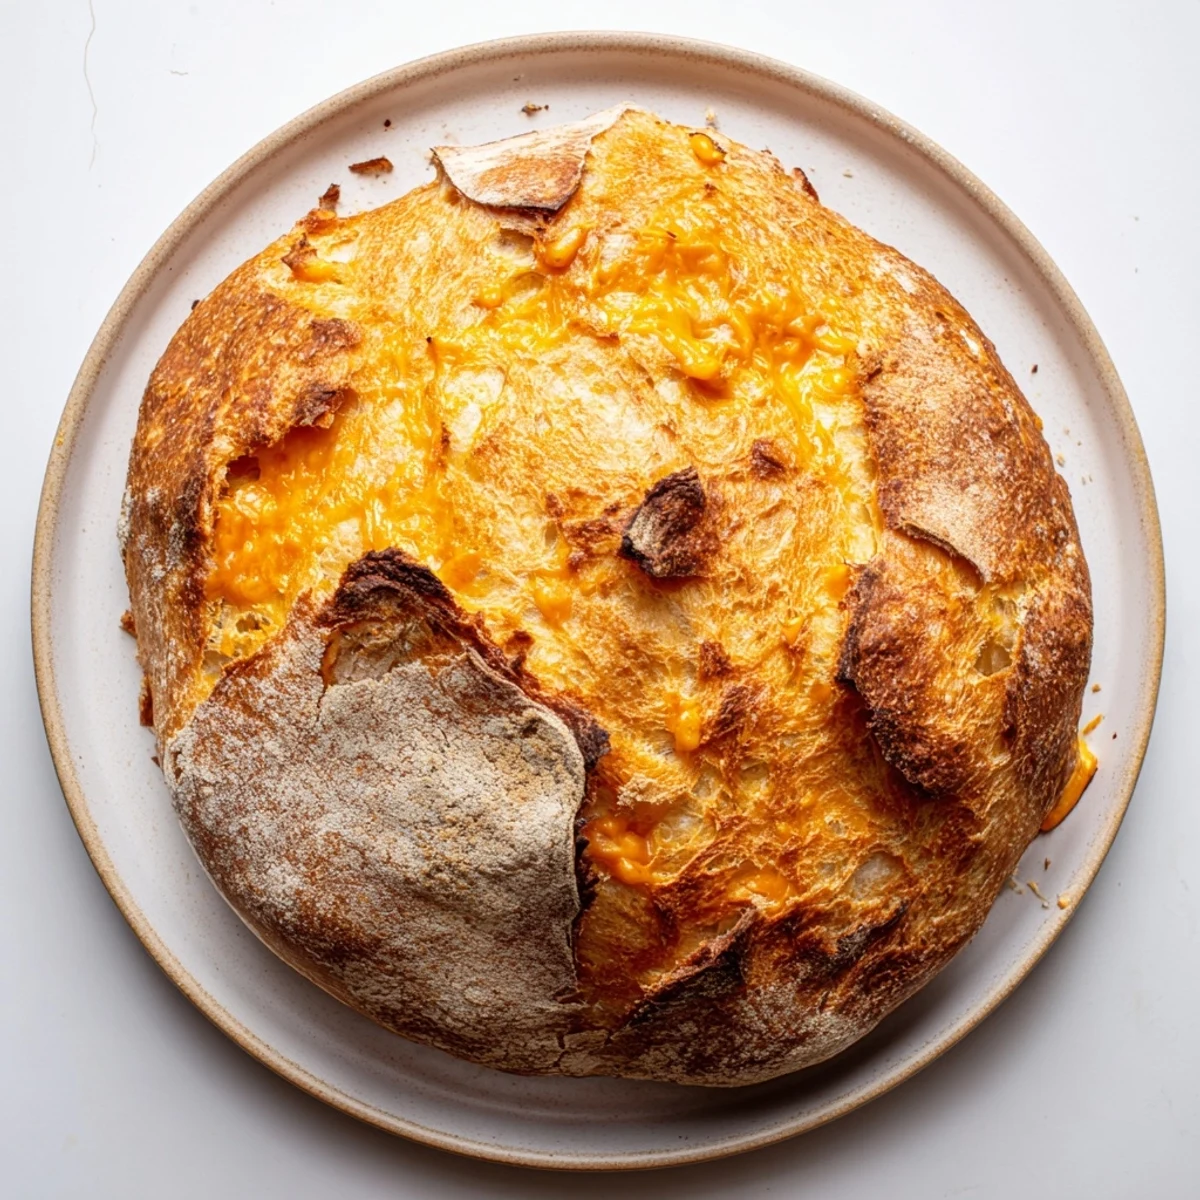
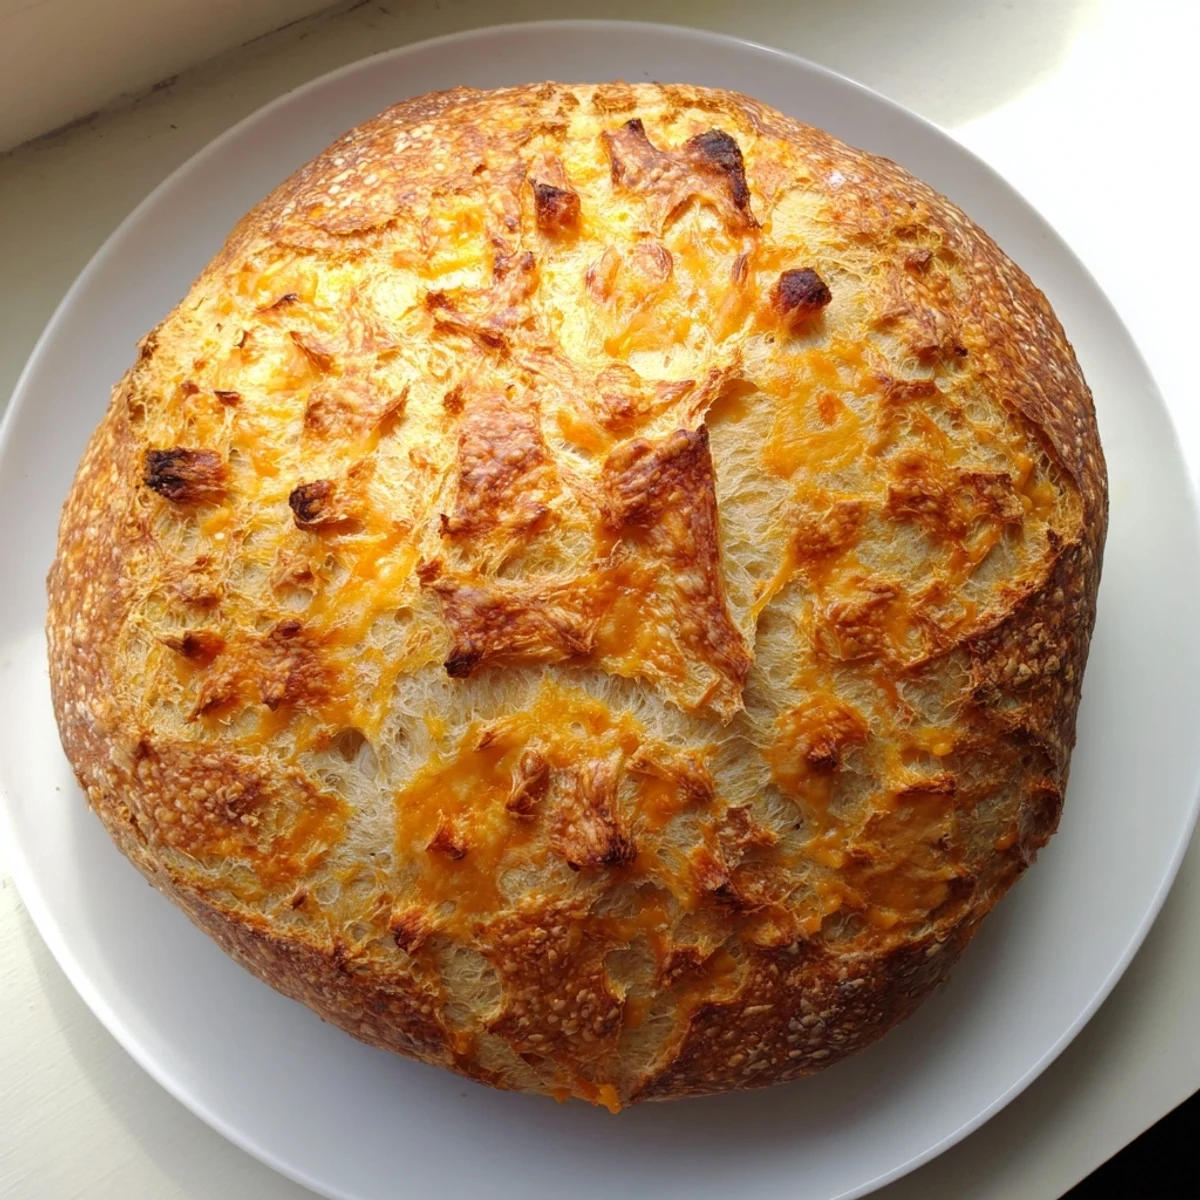
Save Create a bakery-style cheddar loaf with minimal effort. This rustic bread features a golden, crackly crust enclosing a tender interior studded with sharp cheddar. The dough comes together in minutes and requires no kneading—just let it rise, then bake in a hot Dutch oven for professional results.
The high-heat baking method creates steam inside the pot, yielding an irresistibly crisp exterior while keeping the crumb soft and moist. Perfect for slicing thick and serving alongside hearty soups, toasting with butter, or building your favorite sandwiches.
The smell of sharp cheddar hitting a hot Dutch oven still stops me in my tracks every single time. I stumbled onto no-knead bread during a particularly chaotic week when kneading dough felt like asking too much of my already tired arms. That first golden loaf emerged from the pot, and I could not believe something this good required zero physical effort. Now it is my go-to for dinner parties and lazy Sundays alike.
My sister-in-law took one bite of this bread and immediately demanded the recipe, convinced I had secretly taken up bread baking as a serious hobby. I showed her the shaggy mess of dough in my bowl and she laughed out loud. We ate the entire loaf with nothing but butter and that dinner turned into a three hour conversation about how the simplest food often brings the most joy.
Ingredients
- 3 cups all-purpose flour: This creates the perfect structure for the cheese to nestle into without weighing down the crumb
- 1½ teaspoons salt: Do not reduce this because it balances the rich cheddar beautifully
- ½ teaspoon instant yeast: The long rise does all the work here, so a small amount is plenty
- 1½ cups sharp cheddar cheese: Grate it yourself because pre-shredded cheese has anti-caking agents that prevent proper melting
- 1¼ cups lukewarm water: Warm to the touch helps activate the yeast without killing it
Instructions
- Mix the dry base:
- Whisk the flour, salt, and yeast in a large bowl until everything looks evenly distributed
- Add the cheese:
- Toss in the grated cheddar and stir until every flour speck has touched cheese
- Combine with water:
- Pour in the lukewarm water and mix with a wooden spoon until you have a shaggy, sticky mess that looks wrong
- Let it work:
- Cover the bowl tightly and walk away for 3 to 4 hours until it has doubled and bubbles dot the surface
- Heat your vessel:
- Preheat the oven to 450°F and put your Dutch oven inside to heat for at least 30 minutes
- Shape the loaf:
- Turn the dough onto a floured surface, form it into a rough round, and place it on parchment paper
- Rest briefly:
- Let the shaped dough sit covered for 20 to 30 minutes while the oven finishes heating
- Transfer carefully:
- Lift the parchment paper and lower the dough into your screaming hot pot
- Bake covered:
- Put the lid on and bake for 30 minutes to create steam
- Finish the crust:
- Remove the lid and bake 10 to 15 more minutes until the loaf turns deep golden and sounds hollow when tapped
 Save
Save This bread has become my absolute favorite host gift because it travels beautifully wrapped in parchment and people lose their minds over the cheese factor. Last summer I brought a loaf to a lake house weekend and we ended up eating it for breakfast with scrambled eggs, lunch with tomato soup, and alongside the evening grill. The host made me promise to never arrive empty handed again.
The Magic of the Dutch Oven
The Dutch oven creates a miniature steam oven in your regular oven which is exactly what gives no-knead bread that crackly, artisan crust. I spent years making bread without one and the difference is night and day. If you do not have a Dutch oven, any heavy oven safe pot with a tight fitting lid will work.
Making It Your Own
I have discovered that this dough is incredibly forgiving for mix-ins. Fresh chives, rosemary, or thyme take it in a completely different direction. Sometimes I add smoked paprika or a pinch of cayenne to the dry ingredients for a subtle kick that pairs beautifully with the sharp cheddar.
Storage and Serving Ideas
This bread keeps for about two days wrapped in a kitchen towel at room temperature though the crust will soften over time. I love toasting leftover slices and slathering them with butter for a quick snack. The cheese gets all melty and wonderful again under the broiler for about two minutes.
- Wrap the cooled loaf tightly in foil and freeze for up to a month
- Slice before freezing and toast individual slices straight from frozen
- Day old bread makes excellent croutons or breadcrumbs for casseroles
 Save
Save There is something deeply satisfying about serving bread you made yourself even if the process was mostly hands off. Watch people slice through that crunchy crust into the tender cheesy interior and tell me you do not feel like a kitchen wizard.
Common Recipe Questions
- → Why use a Dutch oven for this loaf?
-
A preheated Dutch oven traps steam during baking, creating a professional bakery-style crust. The enclosed environment allows the bread to bake evenly while developing a crispy, golden exterior and tender interior.
- → Can I use other types of cheese?
-
Absolutely. Sharp cheddar provides the best flavor punch, but you can substitute with aged gouda, gruyère, pepper jack for spice, or a blend of your favorite melting cheeses. Keep the total amount the same.
- → How do I know when the bread is done?
-
The crust should be deep golden brown. Tap the bottom of the loaf—if it sounds hollow, it's finished baking. A thermometer inserted into the center should read 200°F (93°C).
- → Can I add herbs or other mix-ins?
-
Yes. Fresh herbs like rosemary, thyme, or chives work beautifully. You can also add garlic powder, diced jalapeños, or even caramelized onions. Keep additions to ½ cup total to maintain proper dough structure.
- → Why does the dough need to rise so long?
-
The extended fermentation allows yeast to develop flavor and create gas bubbles for an open, airy crumb. This slow rise eliminates the need for kneading while producing superior texture and taste.
